Intoduction
Hi All, here we will discuss about the Geo locator in Xamarin technology based Mobile Applications.The Geo locator is much important for any mobile application which wants to access the location like any app which implement or if any app wants auto filled your address in any form etc.
Steps for implement Geo locator :
1 Create a test Project :
Firsty,We discuss on Cross platform Xamarin Project.so please choose cross Platform app when create a project on Visual Studio 2019.
After this, we will get the initial view of project. if you have a already a working project then this step can be skip.
2 Add nuget packages:
In our project, There are three nuget packages which are sufficient for geolocation implementation,which are as follows:
1.Download and install Xam.Plugin.Geolocator 4.5.0.6
You can also install this package manually from here
2. Download and install Plugin.Permissions 3.0.0.12
You can also install this package manually from here
3. Download and install Plugin.CurrentActivity 2.1.0.4
You can also install this package manually from here.this Plugin is only compatible for android solution.
3 Work on permission in Droid:
For accessing geolocation in Droid we have to give permission for two important permission which are as follows:
- ACCESS_COARSE_LOCATION
- ACCESS_FINE_LOCATION
These permission can be checked from
TestGps.Droid > properties > Android Manifest
Or Alternatively,Open TestGps.Droid > Properties > AndroidMenifest.xml
and put folowing code:
<uses-android:name android.permission.access_fine_location="">
<uses-permission android:name="android.permission.ACCESS_COARSE_LOCATION">
4 Work on Permission in iOS:
In iOS, we can get the location services through adding some keys in info.plist
These Key and there string are as follows.
<key>NSLocationWhenInUseUsageDescription</key>
<string>This app needs access to location when open.</string>
<key>UIBackgroundModes</key>
<string>location</string>
<key>NSLocationAlwaysUsageDescription</key>
<string>This app needs access to location when in the background.</string>
<key>NSLocationAlwaysAndWhenInUseUsageDescription</key>
<string>This app needs access to location when open and in the background.</string>
we can add these code in info.plist through these steps
- Right click on info.plist in TestGps.iOS
- Choose iOS manifest editor and press OK.
- Paste the keys.
5 Initialize the Plugin.CurrentActivity in Droid Solution:
- For initializing the Plugin.CurrentActivity,You have to put this code in mainActivity.cs.
Plugin.CurrentActivity.CrossCurrentActivity.Current.Init(this,bundle);
6 Find Location through Geolocator plugin:
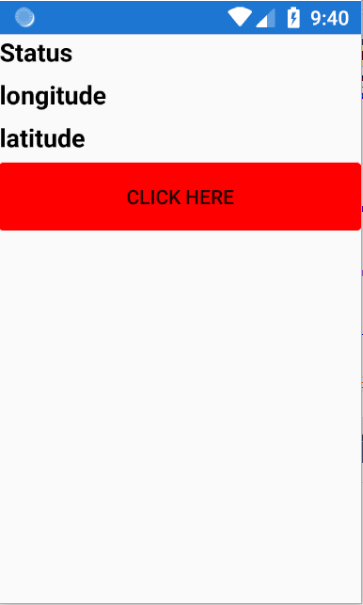
1. we have already create a demo view for show the longitude, latitude and other important information.
-
We have put these Code on button click event beacouse we want to run these code and get data on button clicked.
private async Task Button_ClickedAsync(object sender, EventArgs e)
{
var locator = CrossGeolocator.Current;
locator.DesiredAccuracy = 50;
var position =await locator.GetPositionAsync();
txt_Status.Text = position.Timestamp.ToString();
txt_longitude.Text = position.Longitude.ToString();
txt_latitude.Text = position.Latitude.ToString();
Here,l ocator is object which gives us location through a asynchronous method GetPositionAsync(). the locator have by default 100 meter Desired Accuracy but it can be manually customize.
3. Now,turn on your GPS and allow permission of location your app to access location feature from device. Now we get the location and the following screen we have get.
Work on acquiring Permissions from User:
if a user trying to gather information about location without acquire essential permission to their app, Which are given by user, the app is then crashed which we never want. so these steps help us for preventing crashing of app.
1 Creating a interface:
Now We have to create an interface.That's used for checking whether GPS is ON or OFF and if the GPS is ON then taking an step which help to ON GPS.
using System.Collections.Generic;
using System.Text;
namespace Test_Gps.Interface
public interface IGpsActions
2 Implementing Interface:
Now,we implement the interface in each platform that's are as follows:
In Droid:
using System.Collections.Generic;
using Xamarin.Forms.PlatformConfiguration;
using static Android.iedia.Audiofx.EnvironmentalReverb;
[assembly:Dependency(typeof(Test_Gps.Droid.GpsActionImplementation))]
class GpsActionImplementation : Test_Gps.Interface.IGpsActions
LocationManager locationManager = (LocationManager)Android.App.Application.Context.GetSystemService(Context.LocationService);
public void GpsOnAction()
Intent intent = new Intent((Android.Provider.Settings.ActionLocationSourceSettings));
Forms.Context.StartActivity(intent);
public bool isGpsEnable()
return locationManager.IsProviderEnabled(LocationManager.GpsProvider);
In iOS:
using System.Collections.Generic;
class GpsActionImplimantation : Test_Gps.Interface.IGpsActions
public void GpsOnAction()
UIApplication.SharedApplication.OpenUrl(Foundation.NSUrl.FromString(@"App-Prefs:root=Privancy"));
public bool isGpsEnable()
return CLLocationManager.LocationServicesEnabled;
These code are help us for finding if GPS is ON or whether OFF and we find the GPS OFF then send to the native page according to there platform specifications.
3 work on gather permission at app level:
Now,we work on gather permission at app specification level.It can be gather through cross platform nugat packages
For find Whether App level Permission is ON or OFF we use following code
PermissionStatus status = await CrossPermissions.Current.CheckPermissionStatusAsync(Plugin.Permissions.Abstractions.Permission.Location);
This code give the permission that can be checked whether permission is accept or denied.
PermissionStatus status = await CrossPermissions.Current.CheckPermissionStatusAsync(Plugin.Permissions.Abstractions.Permission.Location);
status==PermissionStatus.Granted
Through the following we can go to the the app setting page where we can give the permission to our app.
crosspermissions.current.openappsettings()
This Code is useful when we find that app does not have app level permission
Now, the permission can be gather without reach to settings page,instead this approach we can also add code through this the app pop the popup and user can give permission on that popup. it can be possible through this code
var newStatus = await CrossPermissions.Current.RequestPermissionsAsync(permission);
Here new Status gives us information about the new state of permisson after the use select on popup.this code can be use anywhere you want to show that popup as onstart Activity.